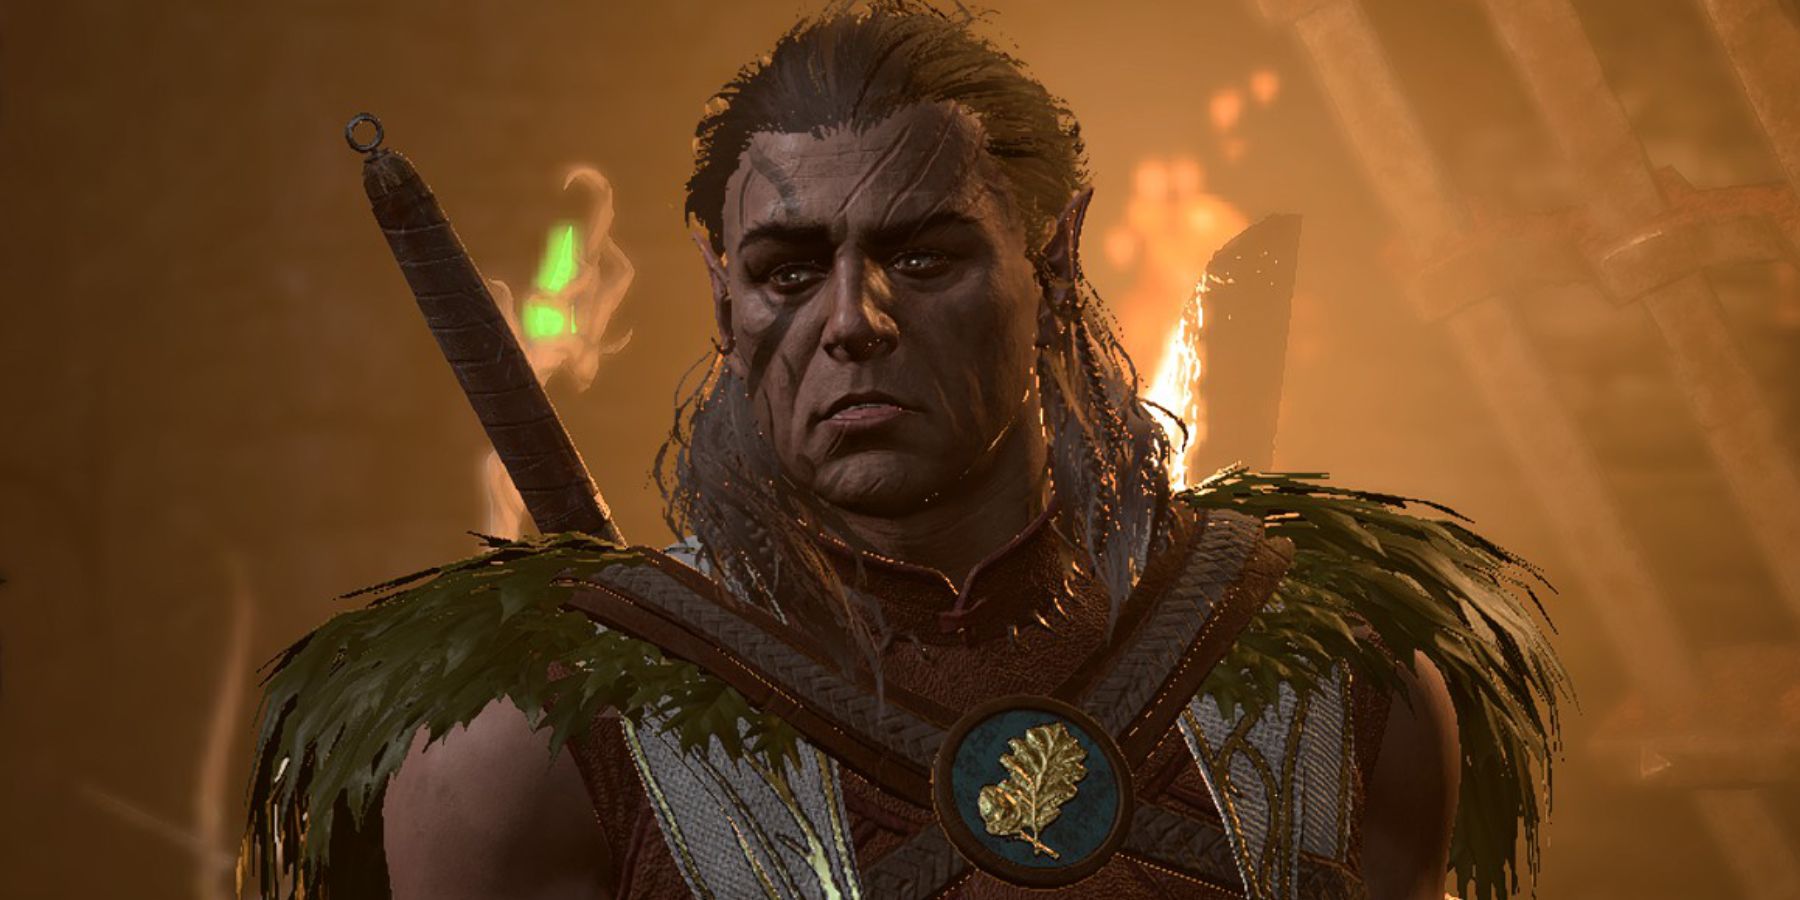
There are a total of 12 classes that players will be able to pick from in the full version of Baldur’s Gate 3, including the multi-faceted Druid Class. There are three subclasses, or Circles, for players to choose from, being the Circle of the Moon, the Circle of the Land, and the Circle of Spores.
Baldur’s Gate 3: Every Druid Subclass, Ranked
Baldur’s Gate 3’s Druid subclasses offer unique abilities ranging from drawing power from the land, to combat shifting, to fungal symbiosis.
Many builds in Baldur’s Gate 3 are based on a single subclass or mechanic of a class, and in the Druid’s case, this is the Circle of the Moon subclass and its enhancements to the class’ intrinsic Wild Shape ability.
Updated December 23, 2023 by Erik Petrovich: To make the best Druid build BG3 players have to do two things: make the right choices for a character’s stats and spells, and equip them with the best Druid items BG3 players can get their hands on. A previous version of this guide to the best Druid BG3 build recommended an endgame-appropriate set of the best Druid gear. Now, the Best Druid Equipment section contains Act-appropriate suggestions. The previous endgame item recommendations can still be found in the Act 3 subsection of the Best Druid Items, but now players can also find a full list of Druid gear that can be acquired in Acts 1 and 2.
As a guide-in-progress, this BG3 best Druid build walkthrough will be continually updated with new information on what makes the Circle of the Moon the best Druid build BG3 offers to players.
Druid Class Introduction & Overview

Druid Playstyle & Signature Abilities
“Druids channel the elemental forces of nature and share a deep kinship with animals. Mastery of Wild Shape allows them to transform into beasts from all over the Realms.”
Druids are one of the most diverse, complex classes in Baldur’s Gate 3 thanks to the sheer variety of options available to the class. Druids are equally capable of being ranged spellcasters as they are close-up tanks, though the best BG3 Druid builds lean into buffing the latter. No matter which Circle BG3 Druids choose, they have access to the unique ability Wild Shape, which allows the class to shapeshift into an animal for different abilities and focuses in combat.

Can You Play Baldur’s Gate 3 With a Controller?
Baldur’s Gate 3 has full controller support with its release for PC – here’s how to enable this game-changing input method in BG3.
The Druid’s unique class feature Wild Shape is the backbone of this class, though its spell list is quite formidable in both offensive and defensive capacities. Even if you want to make a melee-only Druid (as this best BG3 Druid build guide will elaborate on), spells are still an important part of the class rotation. Plan to rotate in and out of Wild Shape to play the Druid most effectively in combat.
Druid Subclasses
- Circle of the Land: Focuses on ranged spellcasting. Grants extra always-prepared spells based on selections at certain levels.
- Circle of the Moon: Focuses on the use of Wild Shape in melee combat. Unlocks subclass-exclusive Shapeshift buffs and options like the Sabre-Toothed Tiger.
- Circle of the Spores: Focuses on control spells and support. Grants always-prepared mix of spells like Cloudkill and Spreading Spores.
Druid Class Proficiencies
- Druid Armor Proficiencies: Light Armor, Medium Armor, & Shields
- Druid Saving Throws: Intelligence & Wisdom
- Druid Skill Proficiencies: Choice 2 from Arcana, Animal Handling, Insight, Medicine, Nature, & Perception
- Druid Weapon Proficiencies: Club, Dagger, Javelin, Quarterstaff, Scimitar, Sickle, & Spear
Druid Class Features – Level By Level
|
Class Feature |
Proficiency Bonus |
|
|---|---|---|
|
Druid Lvl 1 |
+2 |
|
|
Druid Lvl 2 |
|
+2 |
|
Druid Lvl 3 |
+2 |
|
|
Druid Lvl 4 |
|
+2 |
|
Druid Lvl 5 |
|
+3 |
|
Druid Lvl 6 |
|
+3 |
|
Druid Lvl 7 |
+3 |
|
|
Druid Lvl 8 |
+3 |
|
|
Druid Lvl 9 |
+4 |
|
|
Druid Lvl 10 |
|
+4 |
|
Druid Lvl 11 |
– |
+4 |
|
Druid Lvl 12 |
+4 |
Druid Spell Slots & Prepared Spells – Level By Level
|
Prepared Spells |
Cantrips Known |
Lvl 1 Slots |
Lvl 2 Slots |
Lvl 3 Slots |
Lvl 4 Slots |
Lvl 5 Slots |
Lvl 6 Slots |
|
|---|---|---|---|---|---|---|---|---|
|
Druid Lvl 1 |
1 + WIS modifier |
2 |
2 |
– |
– |
– |
– |
– |
|
Druid Lvl 2 |
2 + WIS modifier |
2 |
3 |
– |
– |
– |
– |
– |
|
Druid Lvl 3 |
3 + WIS modifier |
2 |
4 |
2 |
– |
– |
– |
– |
|
Druid Lvl 4 |
4 + WIS modifier |
3 |
4 |
3 |
– |
– |
– |
– |
|
Druid Lvl 5 |
5 + WIS modifier |
3 |
4 |
3 |
2 |
– |
– |
– |
|
Druid Lvl 6 |
6 + WIS modifier |
3 |
4 |
3 |
3 |
– |
– |
– |
|
Druid Lvl 7 |
7 + WIS modifier |
3 |
4 |
3 |
3 |
1 |
– |
– |
|
Druid Lvl 8 |
8 + WIS modifier |
3 |
4 |
3 |
3 |
2 |
– |
– |
|
Druid Lvl 9 |
9 + WIS modifier |
3 |
4 |
3 |
3 |
3 |
1 |
– |
|
Druid Lvl 10 |
10 + WIS modifier |
4 |
4 |
3 |
3 |
3 |
2 |
– |
|
Druid Lvl 11 |
11 + WIS modifier |
4 |
4 |
3 |
3 |
3 |
2 |
1 |
|
Druid Lvl 12 |
12 + WIS modifier |
4 |
4 |
3 |
3 |
3 |
2 |
1 |
Best BG3 Druid Build: Circle of the Moon Overview

What Makes Circle of the Moon the Best BG3 Druid Subclass?
“Druids sworn to the moon draw on its mercurial nature to transform into massive creatures and primal elementals.”
There are three subclasses Druid players can try out in Baldur’s Gate 3: Circle of the Land, Circle of the Moon, and the Circle of Spores. While Circle of the Land focuses on spellcasting and Circle of Spores is a multi-faceted support and damage role, Circle of the Moon improves on the Druid’s ability to use Wild Shape.
Circle of the Moon Druid builds tend to play the close-combat Tank role as they can shift into a Bear form with a Bonus Action, granting a Taunt ability, the Claws attack skill, and a boost to HP. Their other leveling choices make them both a controlling force in melee combat and a powerful support from a distance, though most of one’s time should be spent on maximizing damage output while in Wild Shape.

All Baldur’s Gate 3 Warlock Subclasses, Ranked
The Warlock Class of Baldur’s Gate 3 makes deals with creatures of tremendous power in exchange for their magical ability, here’s how.
When not in melee combat Taunting enemies, Circle of the Moon Druids can rely on their other spellcasting skills. For the most part, though, a Circle of the Moon Druid thrives taking on enemies face-to-face rather than in ranged combat. Abilities like Thorn Whip, Entangle, and Shillelagh keep it going close-quarters when out of Wild Shape form.
Circle of the Moon Subclass Features – Level By Level
|
Circle of the Moon Druid Lvl 2 |
|
|---|---|
|
Circle of the Moon Druid Lvl 4 |
|
|
Circle of the Moon Druid Lvl 6 |
|
|
Circle of the Moon Druid Lvl 8 |
|
|
Circle of the Moon Druid Lvl 10 |
|
Best Druid Ability Scores & Stat Distribution
|
STR |
DEX |
CON |
INT |
WIS |
CHA |
|
|---|---|---|---|---|---|---|
|
Base |
10 |
14 |
16 |
10 |
16 |
8 |
|
Modifier |
0 |
+2 |
+3 |
0 |
+3 |
-1 |
Best BG3 Druid Build: Roleplay & Character Creation Choices

Best BG3 Druid Race: Half-Orc
The Half-Orc race is one of the best races in Baldur’s Gate 3 for Druids who spend most of their time in melee combat. The racial passives of the Half-Orc race still work when in Wild Shape form, letting a Druid tear through enemies with stronger Critical Hits and a resilience to Death unique to Half-Orcs.
The main benefits of Half-Orcs in BG3 are these two passives, called Savage Attacks and Relentless Endurance. Savage Attacks increases damage dealt by Critical Hits, while Relentless Endurance prevents Fighters from going down when they get to 0 HP once per Long Rest. For this Circle of the Moon build, which capitalizes on the Druid’s abilities in melee combat, Half-Orcs offer the most impactful racials.
Best BG3 Druid Proficiencies and Background: Folk Hero
The Folk Hero background grants Proficiency in the Animal Handling and Survival skills, leaving Arcana, Insight, Medicine, Nature, Perception, and Religion available for the two Class choices. Here, choose Perception because of its useful passive boon to noticing important environmental details, and either Insight or Medicine, though Insight is more useful in RP situations.
Being a Folk hero also provides the most RP opportunities and Inspiration as a Circle of the Moon druid, as it just requires players to do things most good-aligned Druids would do, like help animals and explore the wilderness.
Best Circle of the Moon Wild Shape: Owlbear
Druids gain several Wild Shape options as they level up, and Circle of the Moon builds get even more. For the first five levels as a Druid, the best Wild Shape transformation is the Bear, then the Raven. But at Level 6, Druids learn how to transform into an Owlbear, which is the most powerful Wild Shape form for the rest of the game.
The Owlbear has an enormous HP pool, the ability to increase its own Strength, a close-range AoE, and the ability to jump into battle and knock enemies prone. It’s an absolute brute, and becomes the backbone of the best BG3 Druid build soon after acquiring it.
Feats, Spells, & Leveling Choices For Circle of the Moon Builds

|
Class Level |
Choices & Recommendations |
|---|---|
|
Level 1 |
|
|
Level 2 |
|
|
Level 3 |
|
|
Level 4 |
|
|
Level 5 |
|
|
Level 6 |
|
|
Level 7 |
|
|
Level 8 |
|
|
Level 9 |
|
|
Level 10 |
|
|
Level 11 |
|
|
Level 12 |
|
Best Druid Equipment: Armor & Accessories

This section covers the best equipment for Circle of the Moon Druids in BG3 across all three Acts. Some pieces from early Acts may still be powerful in later ones, though, and will remain equipped through several Acts.
- Items with bolded names are new options for the build in each Act, and may replace older pieces of equipment.
- Items with unbolded names must be acquired in earlier Acts, but are strong enough that they don’t need to be replaced in Acts 2 or 3.
Best Circle of the Moon Druid Items & Equipment: Act 1
|
Name |
Effect |
Location |
|
|---|---|---|---|
|
Head |
Key of the Ancient |
Found in the Underground Passage (with the Animal Runes and traps) |
|
|
Cloak |
None Available (except Deathstalker Mantle) |
N/A |
N/A |
|
Chest |
Hedge Wanderer Armor |
|
Purchased from Arron in the Emerald Grove |
|
Gloves |
Gloves of the Growling Underdog |
|
Looted from a chest inside the Shattered Sanctum (near Dror Ragzlin) |
|
Boots |
Boots of Speed |
|
Purchased from Thulla in the Myconid Colony of the Underdark. |
|
Neck |
Pearl of Power |
|
Purchased from Omeluum in the Myconid Colony |
|
Ring 1 |
Shapeshifter’s Boon |
|
Drops from the Strange Ox in Acts 1, 2, or 3 |
|
Ring 2 |
Crusher’s Ring |
|
Drops from Novice Crusher in the Shattered Sanctum of the Goblin Camp |
|
Main Weapon |
Club of Hill Giant Strength |
Break the stool at the top of the Arcane Tower in the Underdark |
|
|
Offhand |
N/A |
N/A |
N/A |
Best Circle of the Moon Druid Items & Equipment: Act 2
|
Name |
Effect |
Location |
|
|---|---|---|---|
|
Head |
Fistbreaker Helm |
|
Purchased from Lann Tarv in Moonrise Towers |
|
Cloak |
Cloak of Protection |
|
Purchased from Quartermaster Talli in the Last Light Inn |
|
Chest |
Barkskin Armor |
|
Purchased from Quartermaster Talli in the Last Light Inn |
|
Gloves |
Gloves of the Growling Underdog |
|
Looted from a chest inside the Shattered Sanctum (near Dror Ragzlin) (Act 1) |
|
Boots |
Boots of Speed |
|
Purchased from Thulla in the Myconid Colony of the Underdark. (Act 1) |
|
Neck |
Pearl of Power |
|
Purchased from Omeluum in the Myconid Colony (Act 1) |
|
Ring 1 |
Shapeshifter’s Boon |
|
Drops from the Strange Ox in Acts 1, 2, or 3 |
|
Ring 2 |
Killer’s Sweetheart |
|
Found on the ground after the Self-Same Trial in the Gauntlet of Shar |
|
Main Weapon |
Club of Hill Giant Strength |
Break the stool at the top of the Arcane Tower in the Underdark (Act 1) |
|
|
Offhand |
N/A |
N/A |
N/A |
Best Circle of the Moon Druid Items & Equipment: Act 3
|
Name |
Effect |
Location |
|
|---|---|---|---|
|
Head |
Shapeshifter’s Hat |
Purchased from special stock of Helsik at the Devil’s Fee |
|
|
Cloak |
Cloak of Displacement |
|
Purchased from Entharl Danthelon in Wyrm’s Crossing |
|
Chest |
Armor of Moonbasking |
|
Purchased from Voiceless Penitent Bareki near the Undercity Ruins Waypoint |
|
Gloves |
Thunderpalm Strikers |
|
After rescuing Wulbren in Act 1, purchase these from him in Act 3 |
|
Boots |
Boots of Speed |
|
Purchased from Thulla in the Myconid Colony of the Underdark. (Act 1) |
|
Neck |
Corvid Token |
|
Keep Mattis alive in Acts 1 and 2, and purchase it from him in Act 3 |
|
Ring 1 |
Shapeshifter’s Boon |
|
Drops from the Strange Ox in Acts 1, 2, or 3 |
|
Ring 2 |
Killer’s Sweetheart |
|
Found on the ground after the Self-Same Trial in the Gauntlet of Shar (Act 2) |
|
Main Weapon |
Club of Hill Giant Strength |
Break the stool at the top of the Arcane Tower in the Underdark (Act 1) |
|
|
Offhand |
N/A |
N/A |
N/A |
Best Druid Multiclass Choices & Builds

Players can choose to Multiclass beginning at Level 2. Look for the “Add Class” button on the top right of the level up overview menu – this will open up a new menu where players can allocate the level to any other class in Baldur’s Gate 3 when selected.
Barbarian Multiclass – Druid 11/Barbarian 1
The Barbarian class has the ability to enter a Rage with a bonus action, granting the ability to use an extra attack with a bonus action on subsequent turns – the effect ends if players don’t take or deal damage on a turn. After using Rage, Druids can use Wild Shape, and the effect will persist while shapeshifted.
With just one point in Barbarian, for a Druid 11 Barbarian 1 build, the Druid will be able to use their bonus action for an additional attack while shapeshifted. Unfortunately, the Unarmored Defense passive of the Barbarian class doesn’t stack with the Druid’s AC while shapeshifted.
Ranger Multiclass – Druid 9/Ranger 3
The Ranger multiclass option for Druids is a bit more of a memey build, but a relatively effective one nonetheless. By dipping three levels into the Ranger class as a Druid, a character will be able to select a Ranger subclass. Choosing the Beast Master subclass unlocks the ability to summon an Animal Companion. One of the options for the Ranger summon is a Bear.
With the Druid’s intrinsic Wild Shape ability, a Druid 9 Ranger 3 build will be able to summon a Bear companion, then shapeshift into a Bear themselves. It’s always good to have more companions on the battlefield, so enemies have more targets to choose from. Having two bears in the party, alongside proper Support companions, makes for a fun and fearsome melee frontline.

Baldur’s Gate 3
- Released
- August 3, 2023
- ESRB
- M for Mature: Blood and Gore, Partial Nudity, Sexual Content, Strong Language, Violence