Ready or Not is a methodical take on the tactical FPS, allowing you to work in teams or dictate an AI-controlled team. It can be tricky when navigating the game’s maps to distinguish hostiles from hostages. Visibility is key, so here’s how to use a flashlight in Ready or Not!
How to turn on your flashlight in Ready or Not
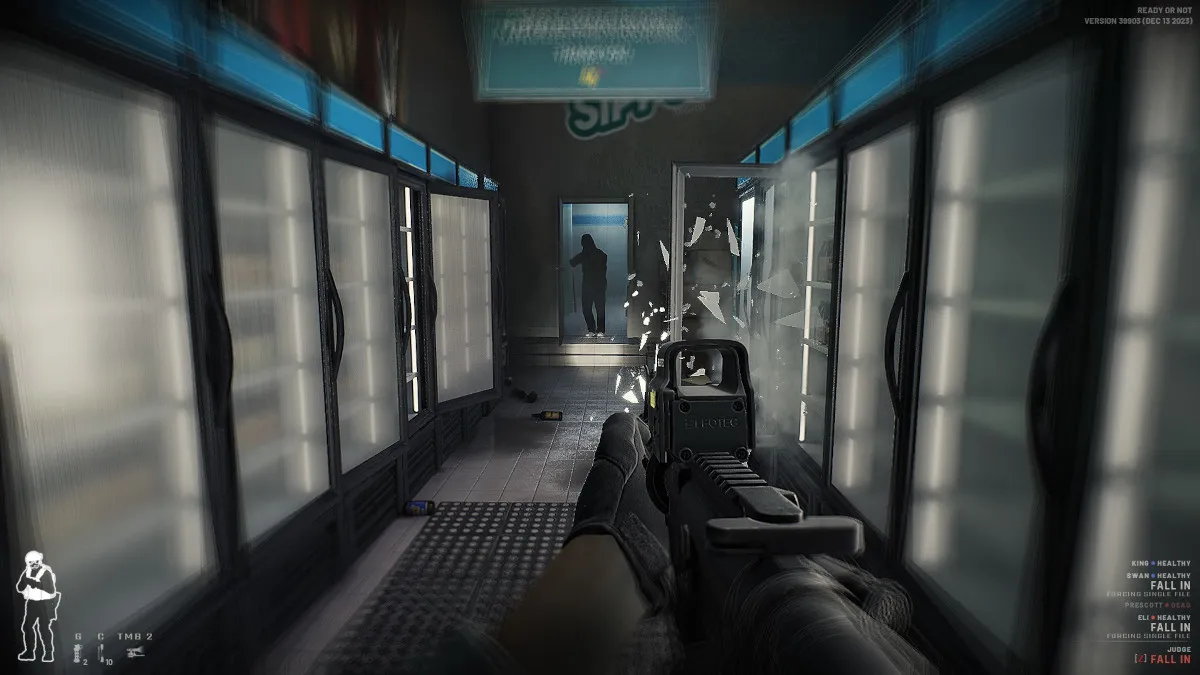
You can turn on your flashlight by pressing TMB 2 (Thumb Mouse Button 2) on your mouse in Ready or Not. This activates the flashlight if it’s an attachment to your gun, so check what you’ve got on there first! This means you can turn on your laser sights with the same command.
TMB 2 is the default keybinding, and while it’s a comfortable fit, you can change it by opening your pause menu and selecting the following:
- Options
- Controls
- Equipment
Related: Is Ready or Not on Xbox? Answered
You can customize the controls for how you turn on your flashlight and other attachments in Ready or Not here. You’ll want to know your surroundings, especially if you’re flying solo.
What are the uses for the flashlight in Ready or Not?
Given the tactical focus of this game, being able to see in dark spots can make a difference. This can mean something like spotting hostages, evidence to bag and tag, or getting the drop on crooks. Even just in the first mission, I grew anxious seeing dark rooms, knowing enemies can panic and run out, guns a-blazing. The flashlight is a simple reassurance, but a necessary one.
That being said, it’s not the only helpful tool in your arsenal when starting. The optiwand, flashbangs, and stinger grenades each can put in the work when it comes to clearing unchecked rooms. But the best use for the flashlight I’ve found is spotting evidence to secure in Ready or Not. This can make the difference between an A- and an S-ranking, so play smart!